Posts

Studio Photography Lab 09

Image
Lab 09 During this virus we were asked to create and test out some DIY studio setups at home. For a while now I have wanted to invest in some studio lights. I recently ordered them from Amazon and they are definitely worth the price. Two very powerful lights although they are a little too bright at time. There is no dimmer so to soften the light I had to improvise. I cut out a old bed sheet to fit over one of my lights. I plan to cut out another one but I'm using it for my fill light to soften the shadows. I found that just the sheet wasn't enough so I grabbed an A3 page and used clothes pegs to hold both the page and sheet. My next mission was to block out the sunlight coming through my window. I have blacked out curtains but light was still purtruding though them. I decided to tape 4 black A2 sheets of paper together to fit the size of my window. This worked very well blocking out 99% of the light. I have a matte black desk that I have been trying

Studio Photography Proposal & Research

Image
Proposal & Research My product that I will be photography and developing an advertisement for Orchard Thieves Cider. I was heavily inspired by the global Jameson Ginger and Lime campaign to promote Jameson Whiskey. I work as a barman and was instantly drawn to the advertisement when I first saw it. The drinks looks incredibly appealing when prepared properly. Below I have added one of their advertisement videos which blew me away. Jameson Ginger & Lime Advert Here are some examples of the many images used to promote the recipe. These are easily achievable and extremely effective.     With the use of photoshop, I could also create a poster like this below. Link to full campaign Absole voka also have some inspiring advertisements. I love the color they use to associate with the fruit flavour the vodka is. It's bright and noticeable.  Since cider is associated with Apples and natural ingredients. I plan to incorporate that into my image. I may

Studio Photography Lab 05

Image
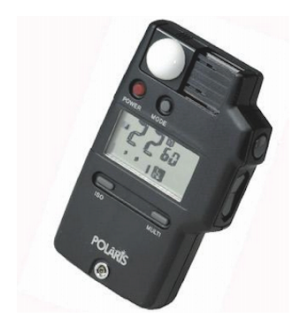
Lab 05 This lab was in preparation for our upcoming lab test which was worth 20% of our final grade. We were introduced to light metering, in particular the handheld light meter. This was a fascinating piece of equipment which took some getting use to. I found it complicated in the beginning but after some messing around with it, it became easier. We test shot some head portrait photos using different ratios. We had to adjust the studio lights to properly light our subjects. This was confusing as the lights were upside down so to increase the light you had to decrease the light a full stop. I learned to adjust a full stop I had to increase or decrease the light 10 times. There's many settings on the handheld light meter and have seen some increasingly complex light meters. Once ran through it is understandable but at first glance it's quite intimidating and unclear. We used the meter on three separate lights following this image as reference.  Fill light

Studio Photography Lab04

Image
Lab 04 In this lab we were introduced to the studio lights properly which I was extremely excited about. I feel this has opened up more possibilities and will motivate me more to pursue photography. I love the images that can be captured by manipulating the lighting. My personal favorite was the half lit face shots, leaving one side of the face completely dark, fading into the black background. Unforuntatly I have no images saved here to display. There were 5 angles we were required to capture. Split which is a 90 degree side angle that lights one half of the subject. Broad: A 45 degree angle with the subject stightly faced diagnally. Butterfly: A top angle, facing straight down. This was one of my favorites as it lights the subject so well and can expose a lot more detail. Rembrandt: 45 Degree angle with the subject facing straght towards the camera allows for good lighting on one half of the face while exposing the opposite side slightly. Loop: An elevated 45 degree angle

Studio Photography Lab03

Image
Lab03 This lab we were learning about using an external flash. I was immediately interested and excited to begin. There was so many different types, ones you can attach onto almost any camera, small and large along with self standing signal transmitted flashes to flash from different angles. There was also little accessories to add onto the flash which can give different effects. These were coloured guards that you could place over the flash giving a green and orange effect on your image. It opened my eyes to new possibilities for future images. Experimenting was a lot of fun and look forward to using it again. Here I am attempting to capture a harsh shadow behind the subject. This can be seen mainly to the back of his head. it's not as dark and noticeable as I would like but it's sufficient.  The next image I attempt to capture almost no shadow by bouncing the flash off the ceiling. This was a difficult one as the roof had a pattern in it which was affecting the

Studio Photography Lab02

Image
Lab02 In todays lab we were introduced briefly to the photography studio. We turned down the lights before we began experimenting with the Flash mode on our cameras. Today I was using the Nikon D3500. I have the D3400 at home so there were subtle differences, none that caused any confusion but the camera sat better in my hands and felt more modern and durable. We had a list of tasks to carry out, changing the values of the flash along with the modes. After taking several random pictures of the roof and floor, the flash extremely bright and almost none existent. I finally got the hang of it somewhat. Me and Sophie teamed up and attempted to begin these tasks. It took a lot of messing around with the iso, APERTURE, and shutter speed before finally agreeing on one. We used F11 Aperture 100 ISO 100 Shutter speed. This was my first picture. The lighting was better than expected but I was met with a very dark, noticeable shadow behind. This was quickly fixed by moving clo

Methodology: Process

METHODOLOGY Digital Journalism Process: Following the success of my previous project. I want to raise the bar. Since we are able to choose from whoever we like in the course. I have decided to join forces with two of my friends that have similar interests and good work ethic, Daniel Jupe and Denis Miculas. They are heavily invested in photography and have the equipment necessary to create some really high end videos and images. I myself have a camera, tripod and GoPro with many attachments so we plan to encorporate it somewhere. As it is a video we're looking to make something cinematic, appealing and impressive. We don't have much experience in this field but we know some basic stuff and we will let our creativity take a hold and see what we come up with. As we look as the topic available to us, nothing is really that appealing. We're currently caught between Digital Journalism and Mapping. We have an fascinating idea for the mapping but are unsure how we would c